昵称:#毕加索#
类别:女鞋设计师
等级: 高级设计师
高级设计师
年龄:44
现所在地:广东 广州
主页浏览总数:6025
总积分:289
文章数:3
作品数:27
美式卡通绘画流程
|
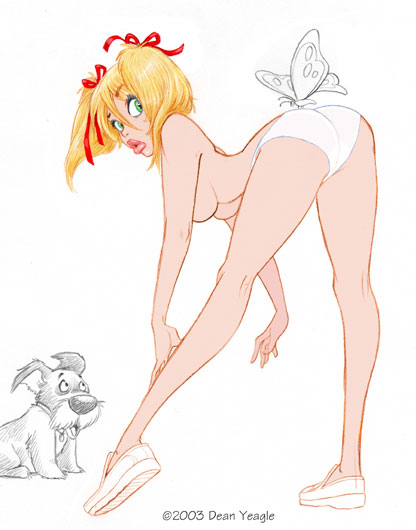
原文作者:Dean Yeagle scene in Bambi where the butterfly lands on Bambi's tail. So I did a Google search, found the pic for reference, and tried to follow it as closely as possible. For a human, however, the head turn is just too much; so I did a couple of other heads on the same page: 我曾经一时冒出一个主意来画一张根据取自Bambi中的著名场景制作的Mandy的图片。所以我搞了把Google搜索,找到了参考图片,并且尝试尽可能完全地参考它。然而作为一个人的头扭转太多了,因此我在同一页上画了一对别样的头部: 图片一:
Then I did a cleaner version, with yet another try at the head: 图片二:
And then I decided I didn't like that head, and replaced it with one from the first page, adjusting the size and the angle: 图片三:
|
Now the next step will be to do a final cleanup, adding a flowered sundress(flowers, butterfly - get the picture?).
I'll post that cleanup next. By the way, the Pup is in the approximate pose of Thumper in the original.
现在,下一步是做一些最后的清洁,加一个花花夏装(花,蝴蝶——看到图片了?)
我将随后贴出那个清理的图片。顺便说一句,小狗的姿势是原图近似。
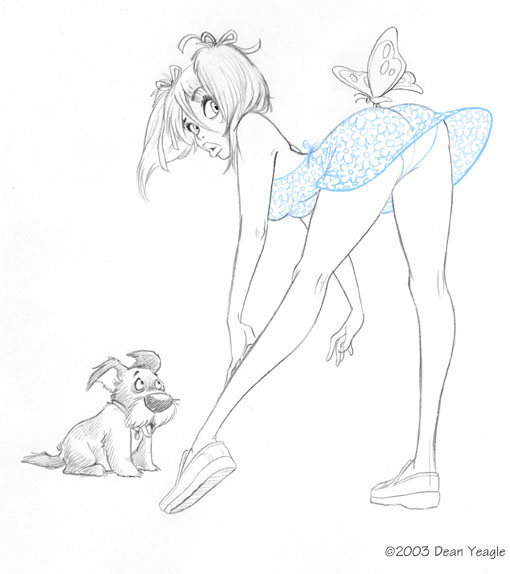
And then the cleanup. This is done with a #2 pencil, and a blue Col-erase pencil for the dress. I did a little fixing here and there, as you see, moving the butterfly, for instance, so she could more easily see it, and raising her left pigtail higher on her head.
下面是清理。这步使用#2铅笔和一个蓝色带橡皮的铅笔画衣服。我在一些地方做了小修改,你可以看出来,比如,移动了蝴蝶,这样她可以更容易地看着它,并且把她头上左边的猪尾巴提高一些。
图片四:
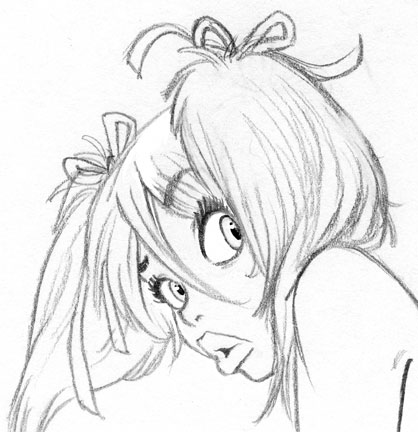
...and here's a closeup of her face, so you can see how 'clean' the cleanup is...I do a lot of cleaning after this point, but basically the line remains somewhat rough - I like the looseness I get that way. By the way, I scan at 300 dpi.
...这里有一个她的脸部的部分放大,所以你可以看到清理得有多清洁...我在这个步骤后做了很多清洁工作,但是基本上说线条还是有些粗糙的 - 我喜欢我那种方法得到的松垮。另外,我用300dpi扫描的。
图片五:
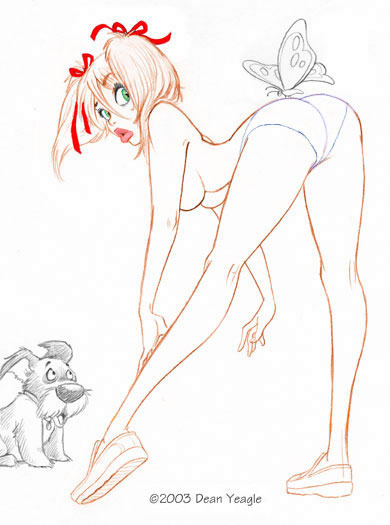
NEXT...I take the paintbrush tool, select a red-brown color, and paint over the line using Overlay in the Options box. That takes care of, in Mandy's case, skin, hair, and shoes...then I take a golden yellow and do it again, at 50%, for her hair.
下一步...我使用画笔工具,选择红棕色,在工具箱选择覆盖来涂抹线条。在Mandy例子中,要注意皮肤、头发和鞋子...然后我使用50%金黄色重新涂一遍头发。
图片六:

ALso red for the ribbons, green for the eyes, and a grayed blue for her underpants (NOTE: well, you probably already have...I've removed the dress, realizing I'll want to make it slightly transparent, and so will need another leverl for that.)
还有丝带用红色,眼睛用绿色,还有内衣裤用蓝灰色(注意:还有,你可能已经...我已经去除了衣服,意识到我要把它弄得有一点透明,所以为此需要另一层)。
图片七:
I have also slightly adjusted her head - it looked a little skewed to me this morning ( a night's sleep changes everything), so I simply selected it, chose Distort, and skewed it back the way I think it should be. Looks right now. Until morning, anyway.
我还稍微调整了她的头——今早它看起来有点儿朝我这歪斜(睡一晚上改变了所有的事情哦),所以我很简单地选择头部,然后选择“扭曲”,然后把它朝我认为应该的方向倾斜回来。现在看看就对罗。无论如何,到早晨时是这样。
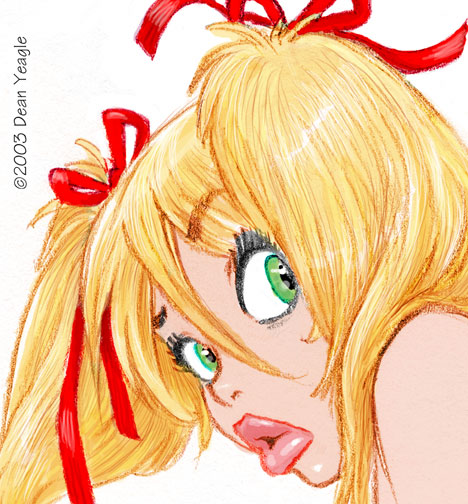
Then I do the hair, eyes, lips, and ribbons - anything that will be a different color than skin. Why? No particular reason, it's just what I do. I'll use white for highlights, at varying opacity, and the same yellow as the hair, using Multiply, to darken other areas of the hair, as well as some red-brown and orange. Then I pick a skin color, starting with a warm, slightly yellowish tan, at perhaps 35%, and use the bucket tool to fill the face. Then I add a little magenta, but not too much to make it cool - 15%, and then in this case, that looked too dark, so I added some white.
然后我处理头发、眼睛、嘴唇还有丝带——所有的都和皮肤颜色不同。为什么?没有特殊原因,我就是这么做了呗。我要是用白色作为高光,变化不透明度,再使用和头发一样的黄色,应用Multiply,暗化头发的其它部分,就像是红棕色和橙色。然后我选了一个皮肤的颜色,暖色调的微微发黄的棕褐色,大概35%,然后使用涂料桶工具开始填充脸部。再往后,我加了一些品红色,不过不多,使之冷一些——15%,在这个例子中看起来有些暗了,所以我加了一些白色。
图片八:
Then I sample the face, and use the bucket (assuming all the lines are closed - which they weren't) to fill the rest of the body, and a slight blue with a bit of the flesh color for the pants.
我在脸部取样,使用油漆桶(假设所有的线条都闭合了——其实不会)来填充剩余的身体部分,短裤使用带一些肉色的淡蓝色。
图片九:
|
All this takes longer to type and post than to do... Rendered version, no skirt yet. First I render the whole figure; then, when I do the skirt on another level, I can adjust the transparency. 图片十:
This step has taken a lot of small steps, but if I'd posted them all, the differences would not be that great; better, I thought, to show the major difference, and then explain. So here goes. I do the rendering by using levels first, and flattening as I go along. I will choose a reddish brown again, and lay down a flat color in what I will want to be a shaded area, and then use the Gaussian Blur on it...this takes a little experimentation, and I change the setting depending on the amount of blur I want. Then it's just a matter of doing that over and over, flattening when I'm sure I want what I've done, and adding different colors - red, blue, purple, brown, black, to the skin for various shadows or tones, and white for highlights. I usually put a white line around the edges of the figure - a broken line, of varied widths, sometimes disappearing in the darkest shadows - but I find that makes the figure pop and acts as an indication of backlight. The line is WITHIN the outline of the figure. When the figure is rendered as I wish, I try one more effect - I make a copy of the figure level, choose the white BG area and delete it (and in this case, the butterfly and dog, too), and then do Image>Brightness/Contrast and darken it considerably. Doesn't matter how much, really, just so it's dark enough; I'll lighten it by taking down the opacity of that level when I'm done. Then I take a large, blurred edge brush on eraser setting, set to perhaps 50%, and take out areas on this darkened level that I want to appear as light. It's like painting with light. I'll bump up to 100% eraser for the lightest edges, and I usually make the eyes as bright as possible, even if the face is in shadow. Then I'll adjust the opacity of the level and that's where I am at this point. Not sure about the color of this sundress, actually, but here it is. 图片十一:
Okay, here's what I think is the final version before the background. New, more energetic and less Jockian pup, slight changes here and there, and a more energetic breeze as well. This is going to be made into a 3D print...I've been contacted by a gentleman in Oregon who has clued me into the amazing world of 3D. Not the simple 'anaglyph' (red/blue) ones I did and sold at the SD Con, but serious ones, made with great care and detail, and visible in two ways - one by crossing your eyes in the manner of those Magic Eye things which infested the Malls of America for a while a few years ago, but with single images instead of amazing and dopey shapes appearing out of unrelated pictures, and the other printed on cards and seen with viewers of the same sort as the old-time stereopican slides. He's done a few versions for me, including the Mandy with flower, and the effect is just terrific. 图片十二:
|